World Backup Day 2025: Sweet Deals to Keep Your Data Safe
At TheSweetBits, we’ve rounded up some of the best deals from top backup solution providers.

As a Mac user, I know the feeling of panic when a partition vanishes. That sinking realization that potentially years of data, projects, or essential backups have disappeared from your drive list. It’s one of the most frustrating and common Mac issues we cover.
Whether you accidentally deleted a volume, a macOS update went sideways, or the file system simply corrupted itself, the good news is that the data is often still there. It’s usually just the map (the partition table) that’s gone missing.
This comprehensive guide will walk you through three increasingly advanced methods, starting with the safest and easiest native solution. By the time we’re done, we’ll have your drive map—and your data—back where it belongs.
Before you proceed with any recovery method, this is the single most important rule you must follow to guarantee the best chance of success: Do not write any new data to the affected drive.
When macOS deletes a partition, it doesn’t erase the underlying data; it simply marks that space as available. If you install software, save a file, or even allow the system to write logs, you risk overwriting the lost data blocks, making that information permanently unrecoverable.
On modern macOS (High Sierra and later), Apple uses the Apple File System (APFS), which complicates the traditional definition of a partition.
| Cause | Description | Recovery Method Focus |
|---|---|---|
| Filesystem Corruption | Most common. The partition map is damaged due to a sudden power loss, improper ejection, or system crash. The partition exists but cannot be read. | Method 1: Disk Utility |
| Manual Deletion Error | You accidentally deleted the wrong volume or container using Disk Utility or a third-party tool. | Method 2 or 3: TestDisk / Commercial Software |
| macOS Update Failure | An update fails mid-installation, corrupting the partitioning scheme (often on older Core Storage volumes). | Method 2 or 3: TestDisk / Commercial Software |
If your partition vanished due to corruption (the most likely scenario), macOS’s built-in Disk Utility can often repair the damage without needing complex software. This is always the safest and first step.

Requirement: You must boot into macOS Recovery Mode to ensure the disk is not in use.
Command (⌘) + R.What to know
When Disk Utility fails, we move to open-source power tools. TestDisk is a powerful, free, command-line utility designed specifically to recover lost partitions and repair boot sectors.
TestDisk runs in the Terminal and is non-GUI. Misuse can cause further data loss. Use extreme caution and strictly follow the on-screen prompts.
Requirement: You must install TestDisk onto a separate external drive or USB stick, as per the Non-Overwrite Rule.
/bin/bash -c "$(curl -fsSL [https://raw.githubusercontent.com/Homebrew/install/HEAD/install.sh](https://raw.githubusercontent.com/Homebrew/install/HEAD/install.sh))"
brew install testdisk
sudo testdisk
After writing, quit TestDisk and reboot your Mac. The partition should be mounted and accessible.
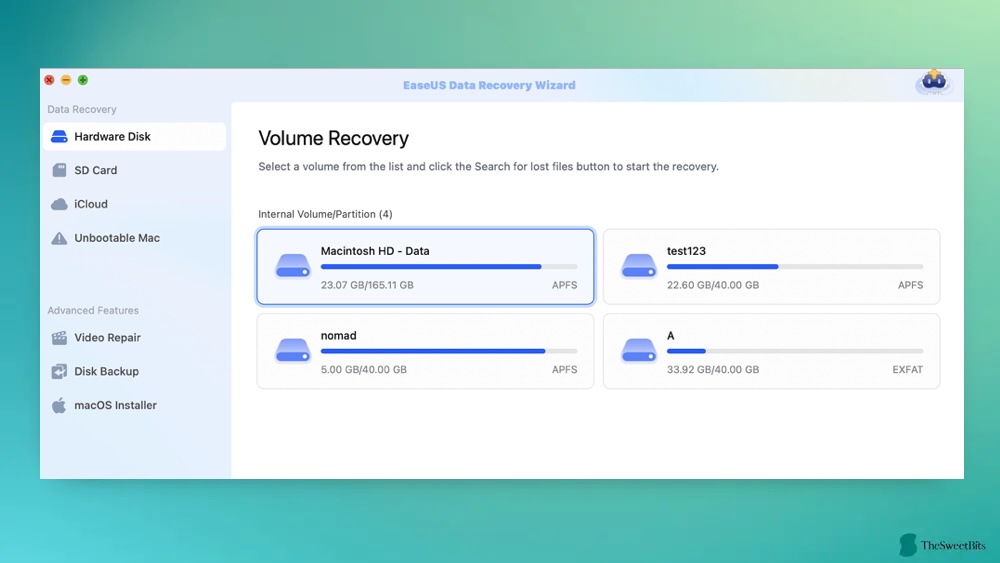
If neither Disk Utility nor TestDisk can locate or repair the partition table, the safest and easiest path forward—especially for non-technical users—is commercial recovery software. These applications use deep-scan algorithms and provide a simple graphical user interface (GUI).

Crucial Step: You must download and install this software on a separate, healthy drive (either an external SSD or another Mac) to prevent data overwrite.
This method bypasses the corrupted partition table and reads the raw data underneath, allowing you to copy files to a safe location.
An ounce of prevention is worth a pound of recovery. Implement these two practices immediately to avoid this issue in the future:
Recovering a lost partition can feel daunting, but by following a disciplined, tiered approach (Repair > Free Advanced > Commercial), the chance of success is very high. Remember that in the world of data recovery, patience and not writing data are your two most powerful tools.
Q: Can I recover a partition that was encrypted with FileVault?
A: Yes, but it significantly complicates the process. If you use commercial software (Method 3), you must provide your encryption key (or recovery key) during the scanning or mounting phase. TestDisk (Method 2) is highly unlikely to work with encrypted partitions unless you are extremely experienced.
Q: My Mac won’t boot at all. What now?
A: This reinforces the Non-Overwrite Rule. You must use a second Mac and connect the faulty Mac’s drive via Target Disk Mode (T key at startup for Intel Macs) or remove the drive and place it in an external enclosure. All recovery steps must be performed from the second, healthy machine.
Q: After recovery, should I trust the old partition?
A: If the partition was recovered successfully using TestDisk, or if data was recovered using commercial software, you should immediately format the original physical disk (Container) and create a new, healthy partition before writing the recovered data back. The corruption that caused the loss is often persistent.
Q: What if no partition or container appears at all in Disk Utility (shows as ‘Uninitialized’ or not listed)?
A: This may indicate the partition map or GPT header is damaged. At this point you’ll likely need tools that can scan the full raw disk (Method 2 or 3) or professional recovery — you should not initialise/erase the drive, as that will write a new partition map and reduce chances of recovery.
Keep learning:
At TheSweetBits, we’ve rounded up some of the best deals from top backup solution providers.
If you are a person who is suffering from lagging PC or frequent problems with apps, you must try these…
Looking to improve your PC's drive performance? Check out our top 6 practical tips for freeing up your computer's space.